Anatomy of a Room
Background
Our next game, The Incident at Galley House, is an adaptation of a text-based game called Type Help. It takes place at Galley House, a dwelling in the English countryside, during a dinner party where things go sideways.
Galley House is divided into many rooms, and the core gameplay involves following characters from room to room, listening in on their conversations, learning their motives, and eventually piecing together a mysterious incident.
In Type Help, the rooms are barely described. If a character in the game interacts with something in the room, it gets mentioned. Otherwise, it’s up to your imagination to fill in the blanks. This gave us quite a bit of creative freedom when creating the artwork for these spaces.
The Floor Plan
The first step was creating a believable floor plan for the house. This involved figuring out which rooms needed to be adjacent to each other, then consulting with William Rous (Type Help’s designer) about any specific limitations.
After that, Robin sketched a basic structure in Blender:
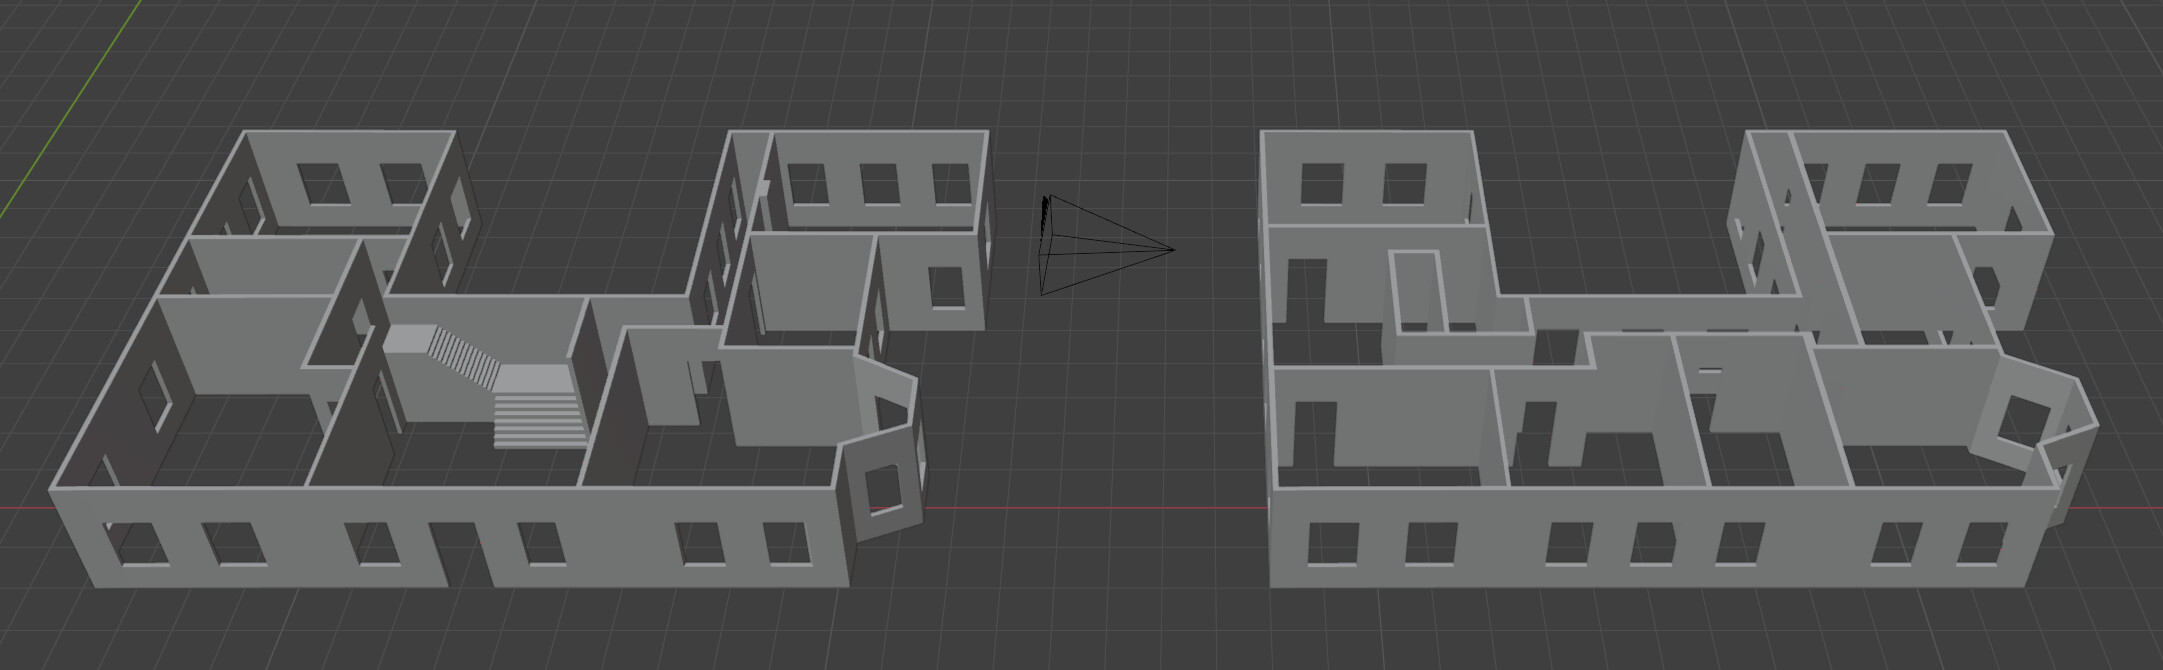
Once we had a sketch to work from, we moved rooms around and iterated until things were consistent in the game world. From there, we could make a simple model of how Galley House looked from the outside:
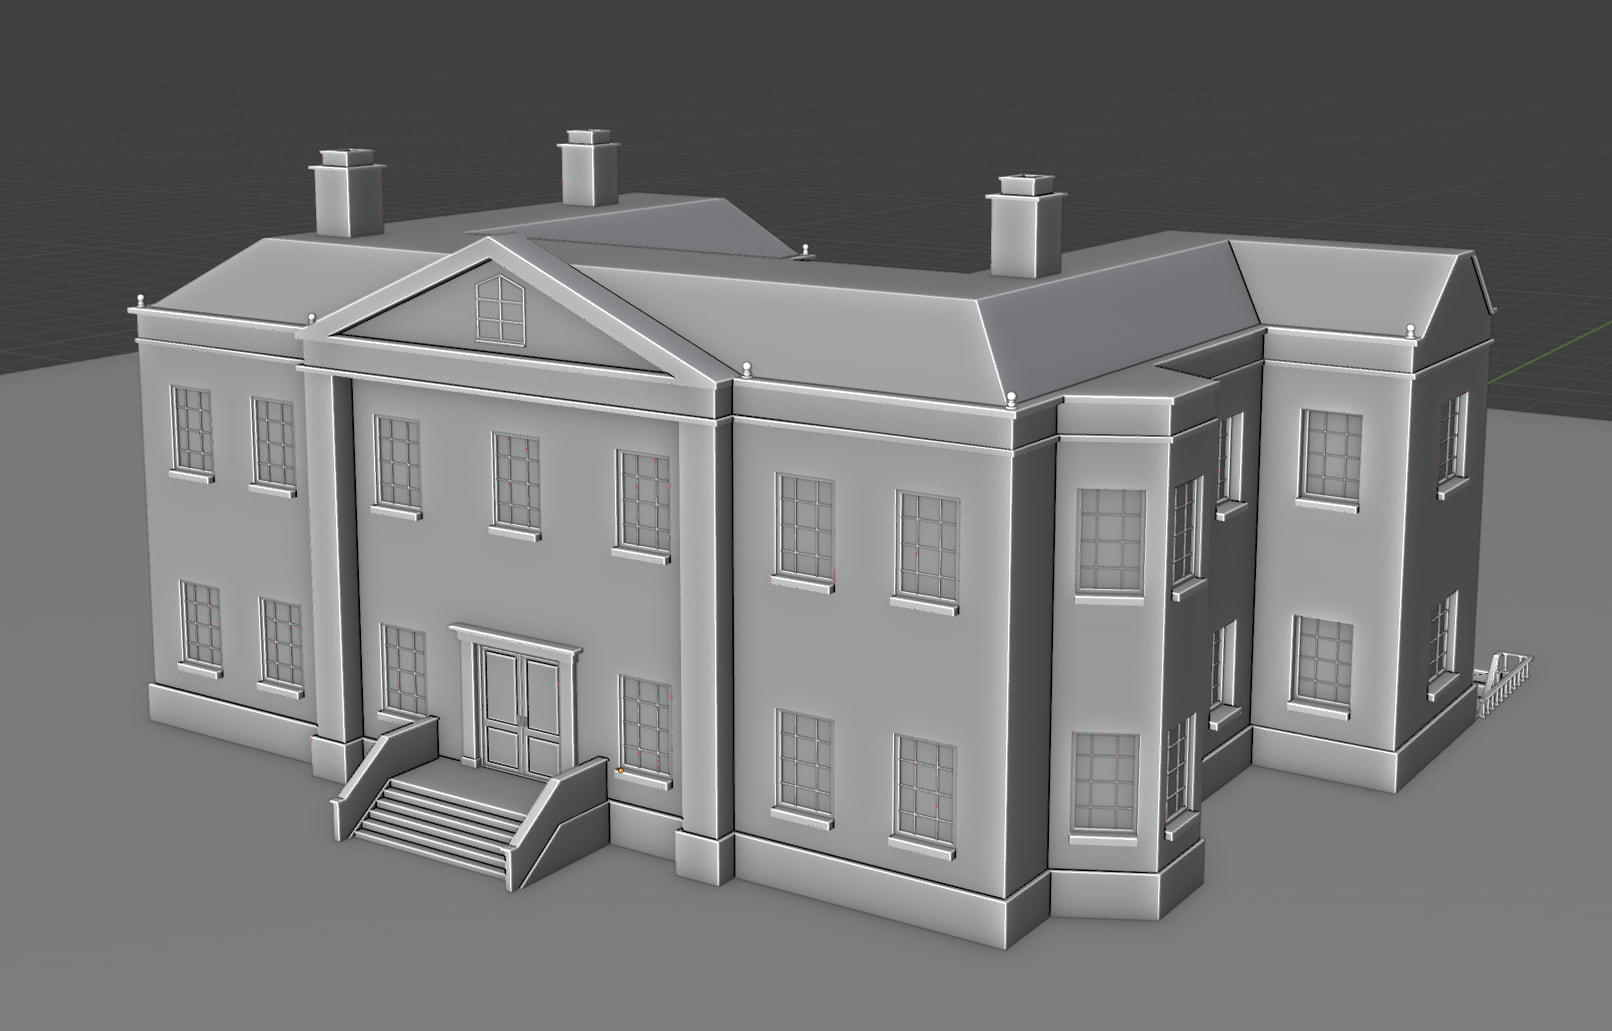
The exterior model was inspired by Piers Court, which was built in the late 1700s.
The Art Brief
With the layout in place, we moved on to defining the look of each room. At this point, the team started assembling references for an art brief for Henning Ludvigsen, our digital artist.
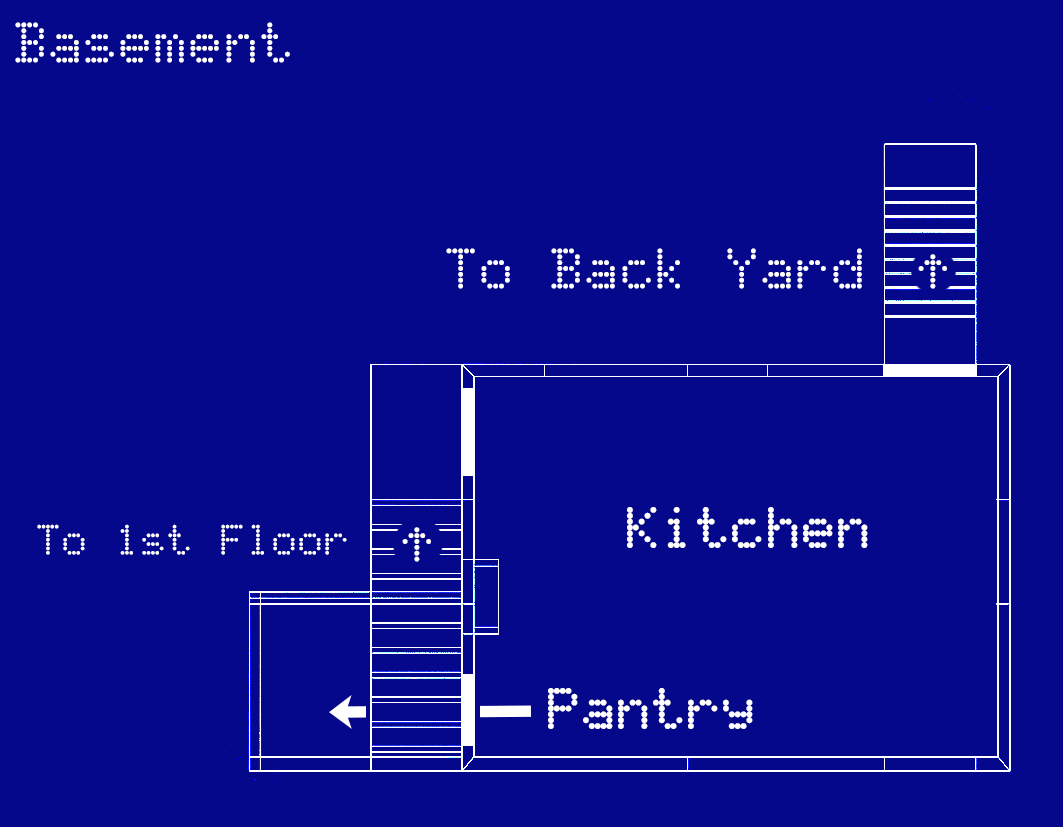
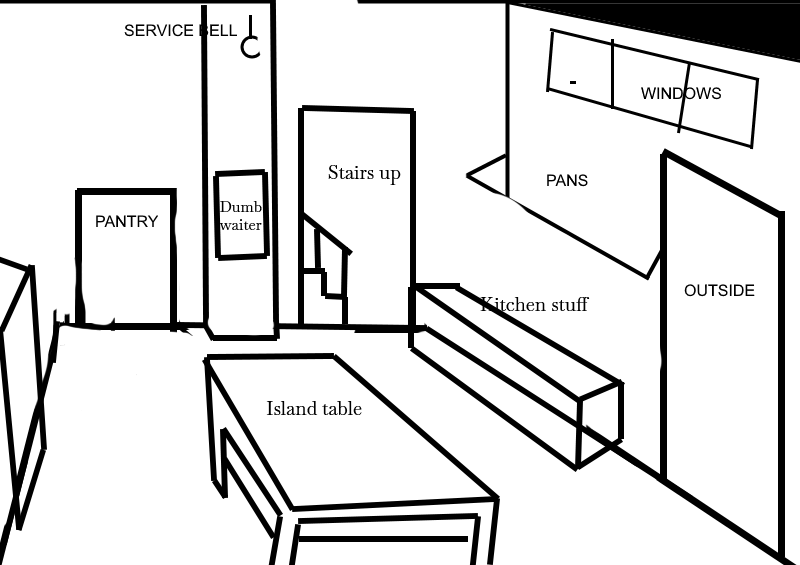
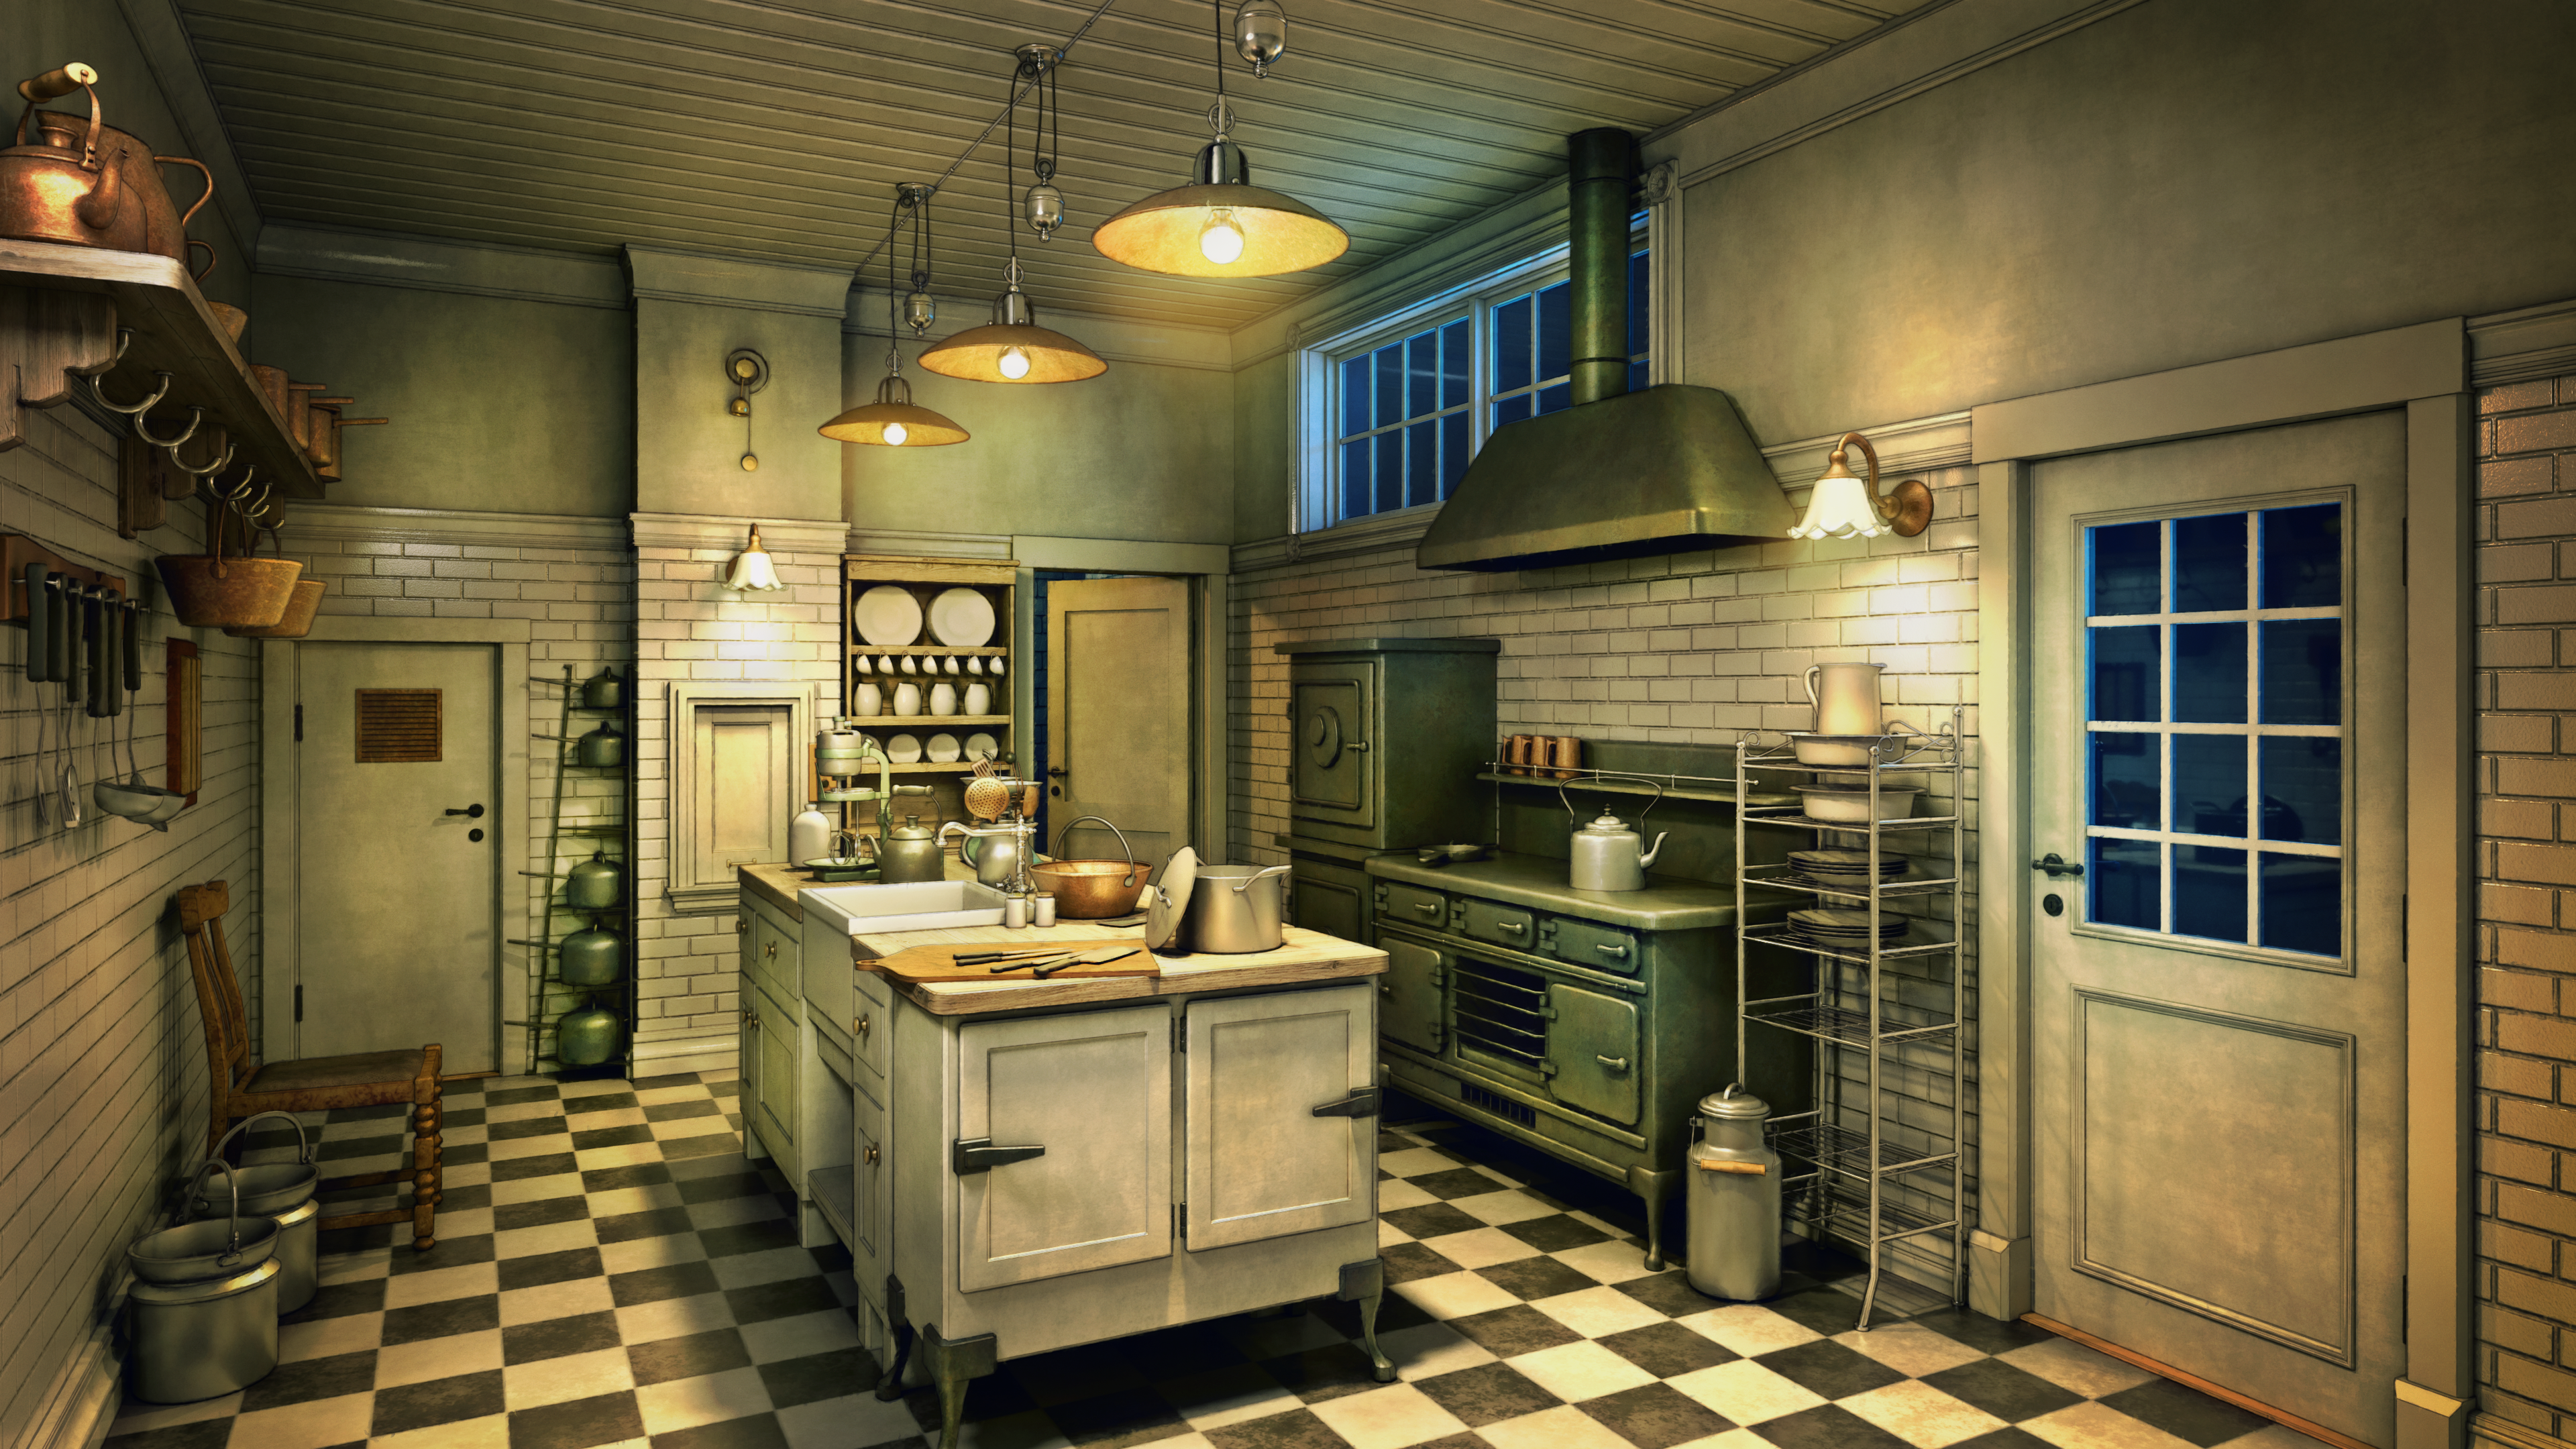
Using the Kitchen as an example, we started with a blueprint:
Then, we looked for reference images of period-appropriate English kitchens on the web.
The Kitchen is in the basement of Galley House, which meant it needed a back door and some above-ground windows.
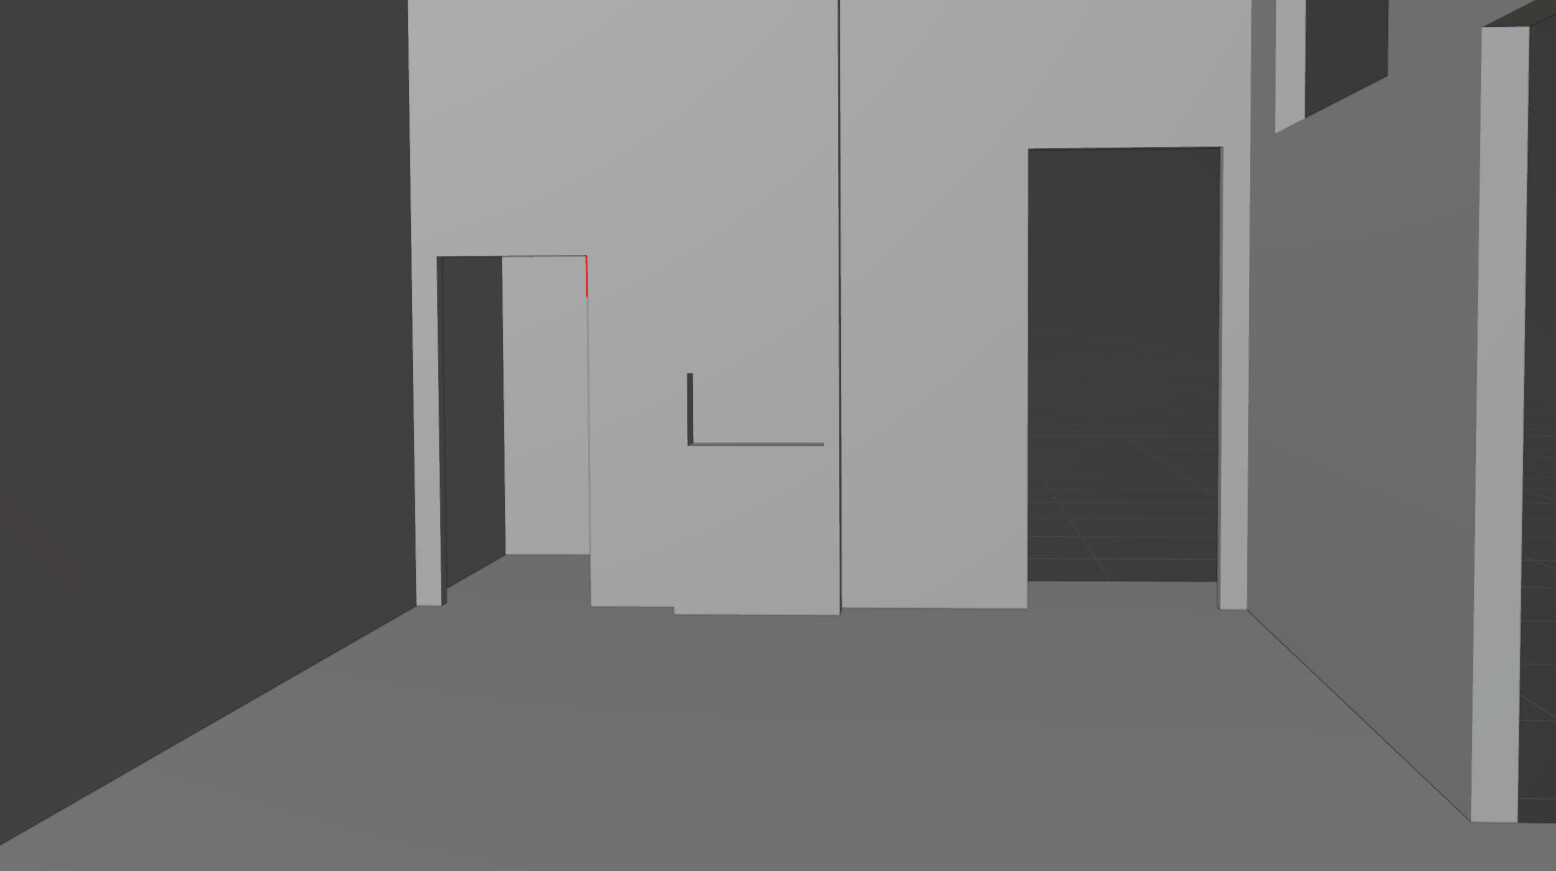
We used the Blender floor plan to explore camera angles that worked for us. Here’s one we liked:
We also had some specific requirements for furniture from the game’s plot. A quick Photoshop sketch was useful to show how it could be set up:
Jeremy’s great at filling in the details, so he assembled the rest of the brief for the room, including game-specific notes for Henning and other practical information, such as which times of day we’d need renders for. Once we were all confident the details were correct, we sent it over to Henning for illustration.
Creating the Illustration
Henning starts by creating the room in 3D Studio Max, finding a good camera angle, then populating the room with props according to the brief. He has a pretty extensive library of 3D assets which he can use as is or as a foundation, although he often models props from scratch. And with this not being real-time 3D, there’s no need for clean geometry or polycount.
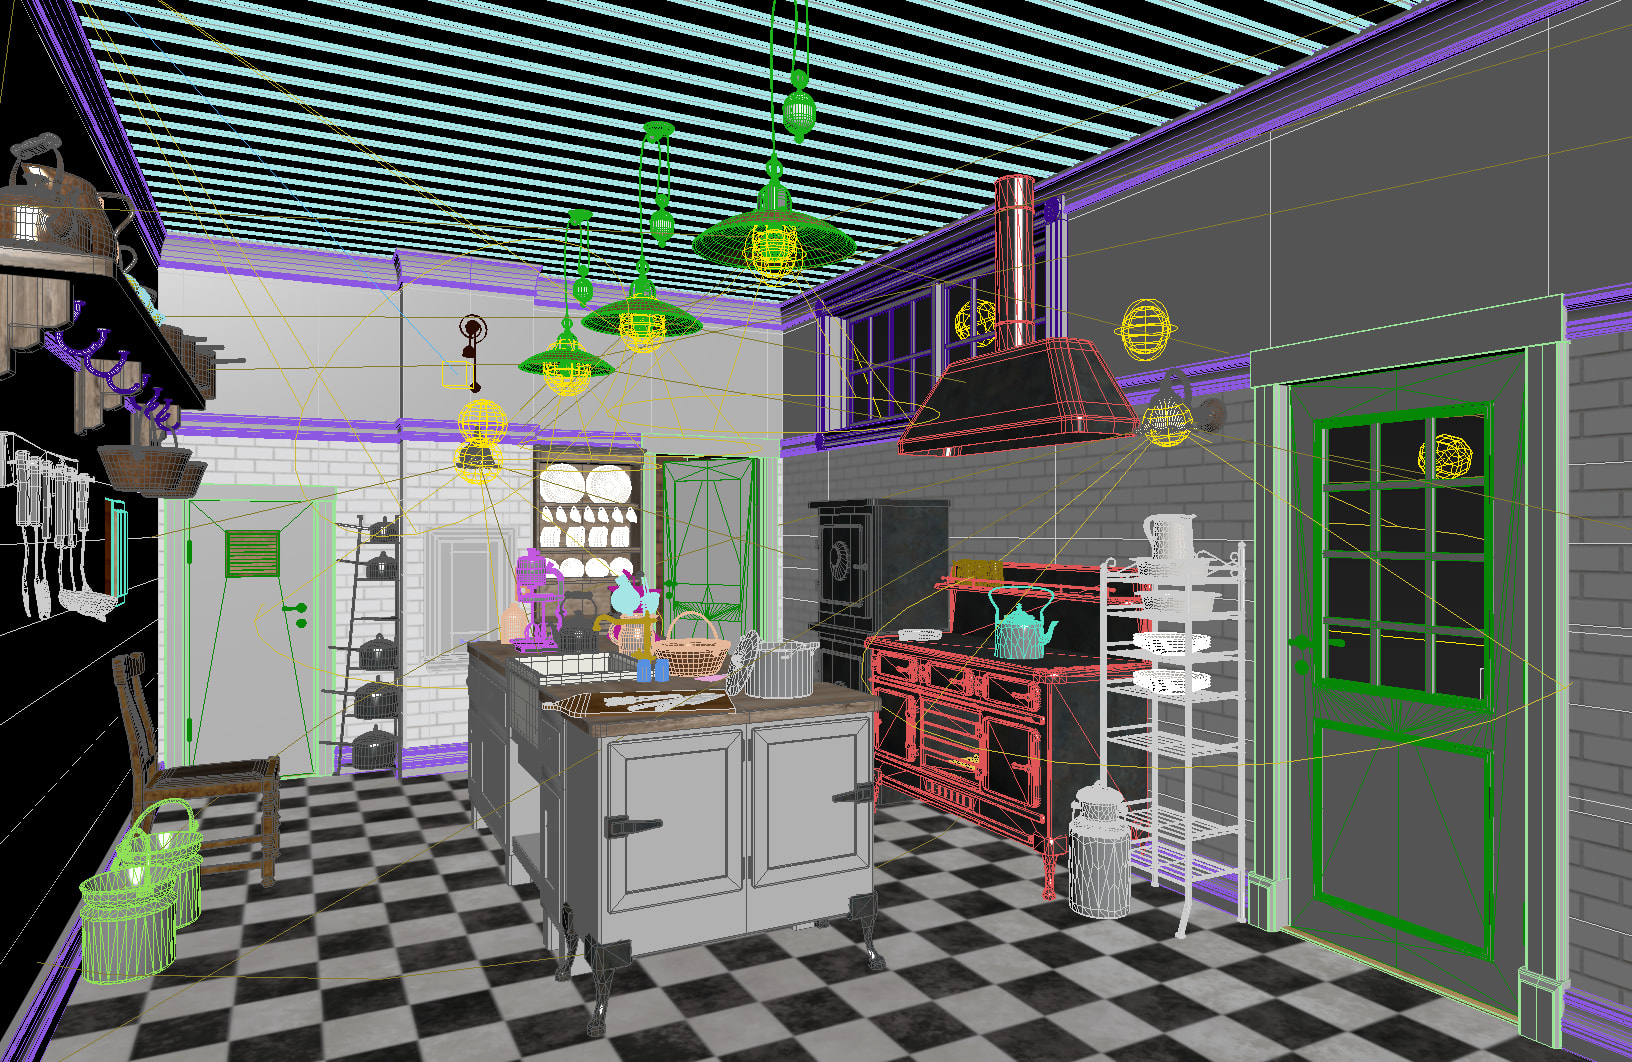
Once the 3D room scene is ready, work begins on a handful of render passes:
-
The first pass is a generic render with the room as is, with textures and light sources.
-
The next pass removes all textures and ambient occlusion to get a clean render of the scene’s light sources.
-
All light sources are removed except for a basic ambient occlusion pass to provide a sense of soft depth and natural shadows. Any faces that might block light are opened, allowing light to spill in through the windows. Entire walls might be removed behind the camera to get even more light into the room.
-
Next, a completely white, emissive material is created for a basic outline pass.
-
The final pass is used to set up masks to separate the different parts of the image for digital painting.
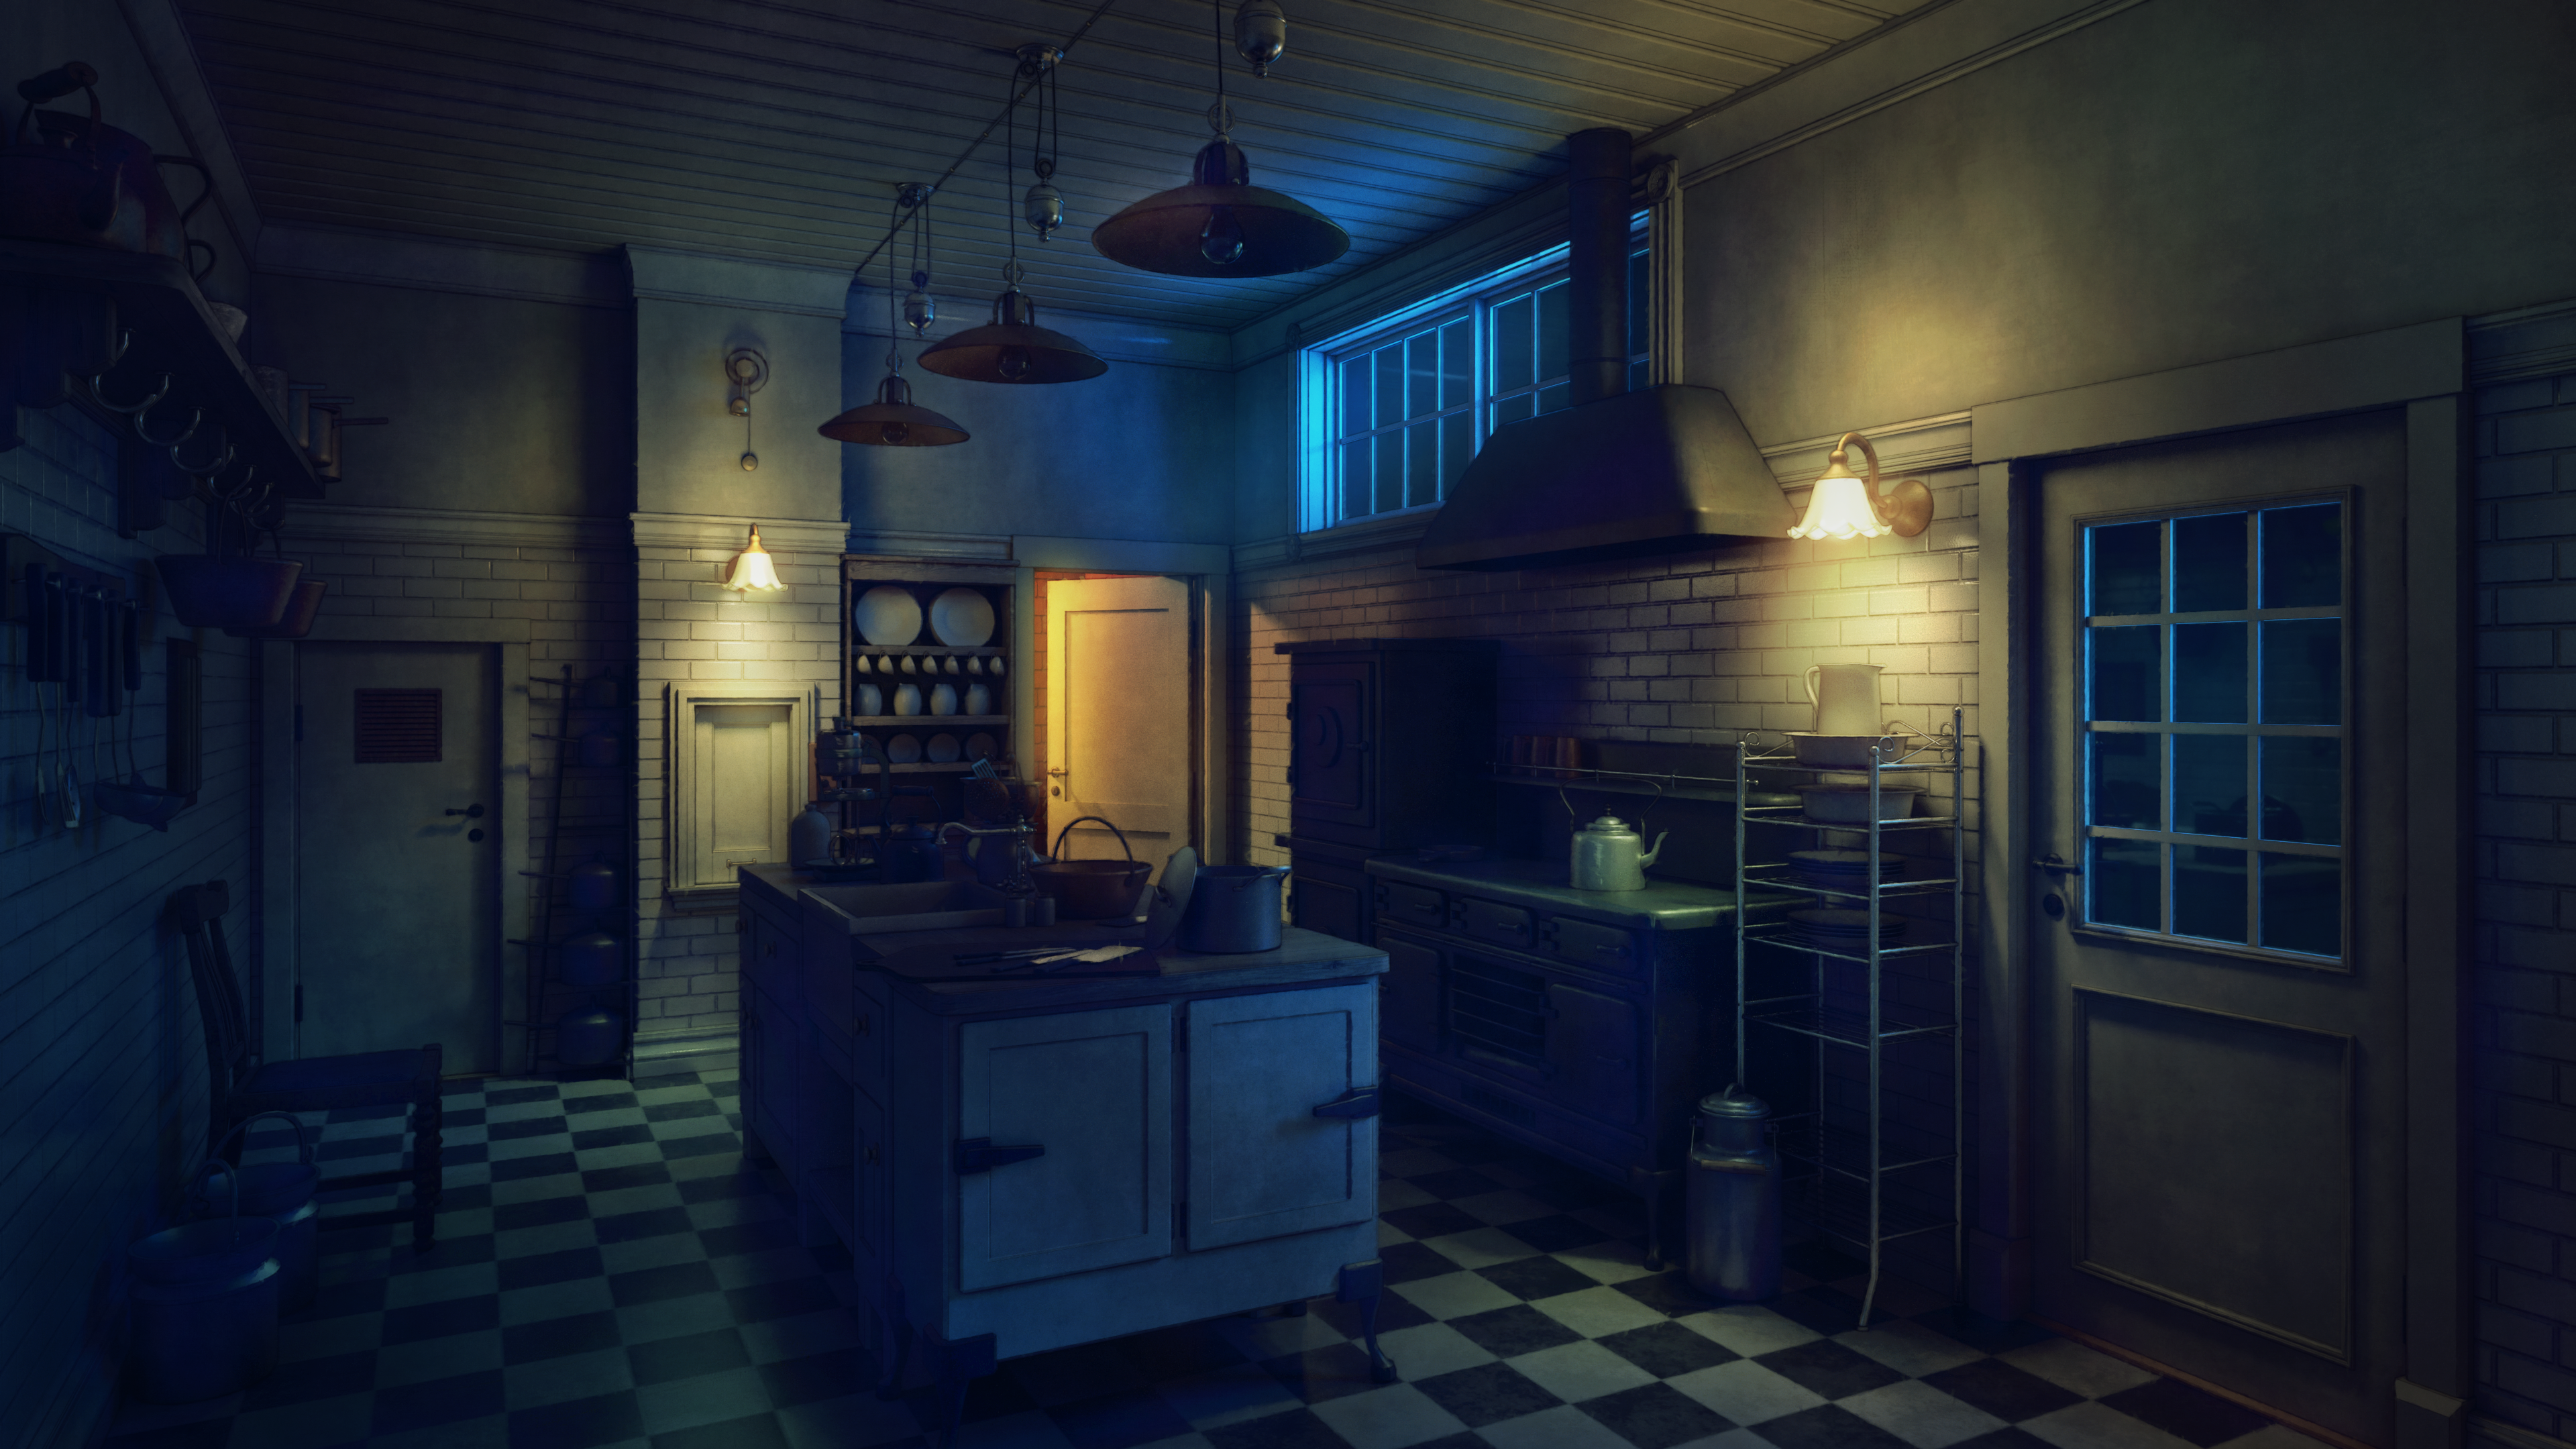
Henning then switches to Photoshop, and starts the 2D painting process on a Wacom Intuos tablet. Extra details are added and textures are cleaned up.
The final step involves adding atmospheric tint and glow, plus some minor grunge textures to make the illustrations less “render-perfect."
When it comes to rendering the same scenes at different times of day, using 3D modelling as the foundation really pays off. With this in place, creating alternate renders for different times of day simply comes down to turning light sources on or off, adjusting the exterior directional light (the sun), and composing things in such a way that the shape of the window is cast into the room.
Depth Masks
Since we often show the same rooms at different times of day, we have separate illustrations for each. We also need support for occluding characters behind foreground objects, like the Kitchen’s island table. For this, we create a simple depth mask.
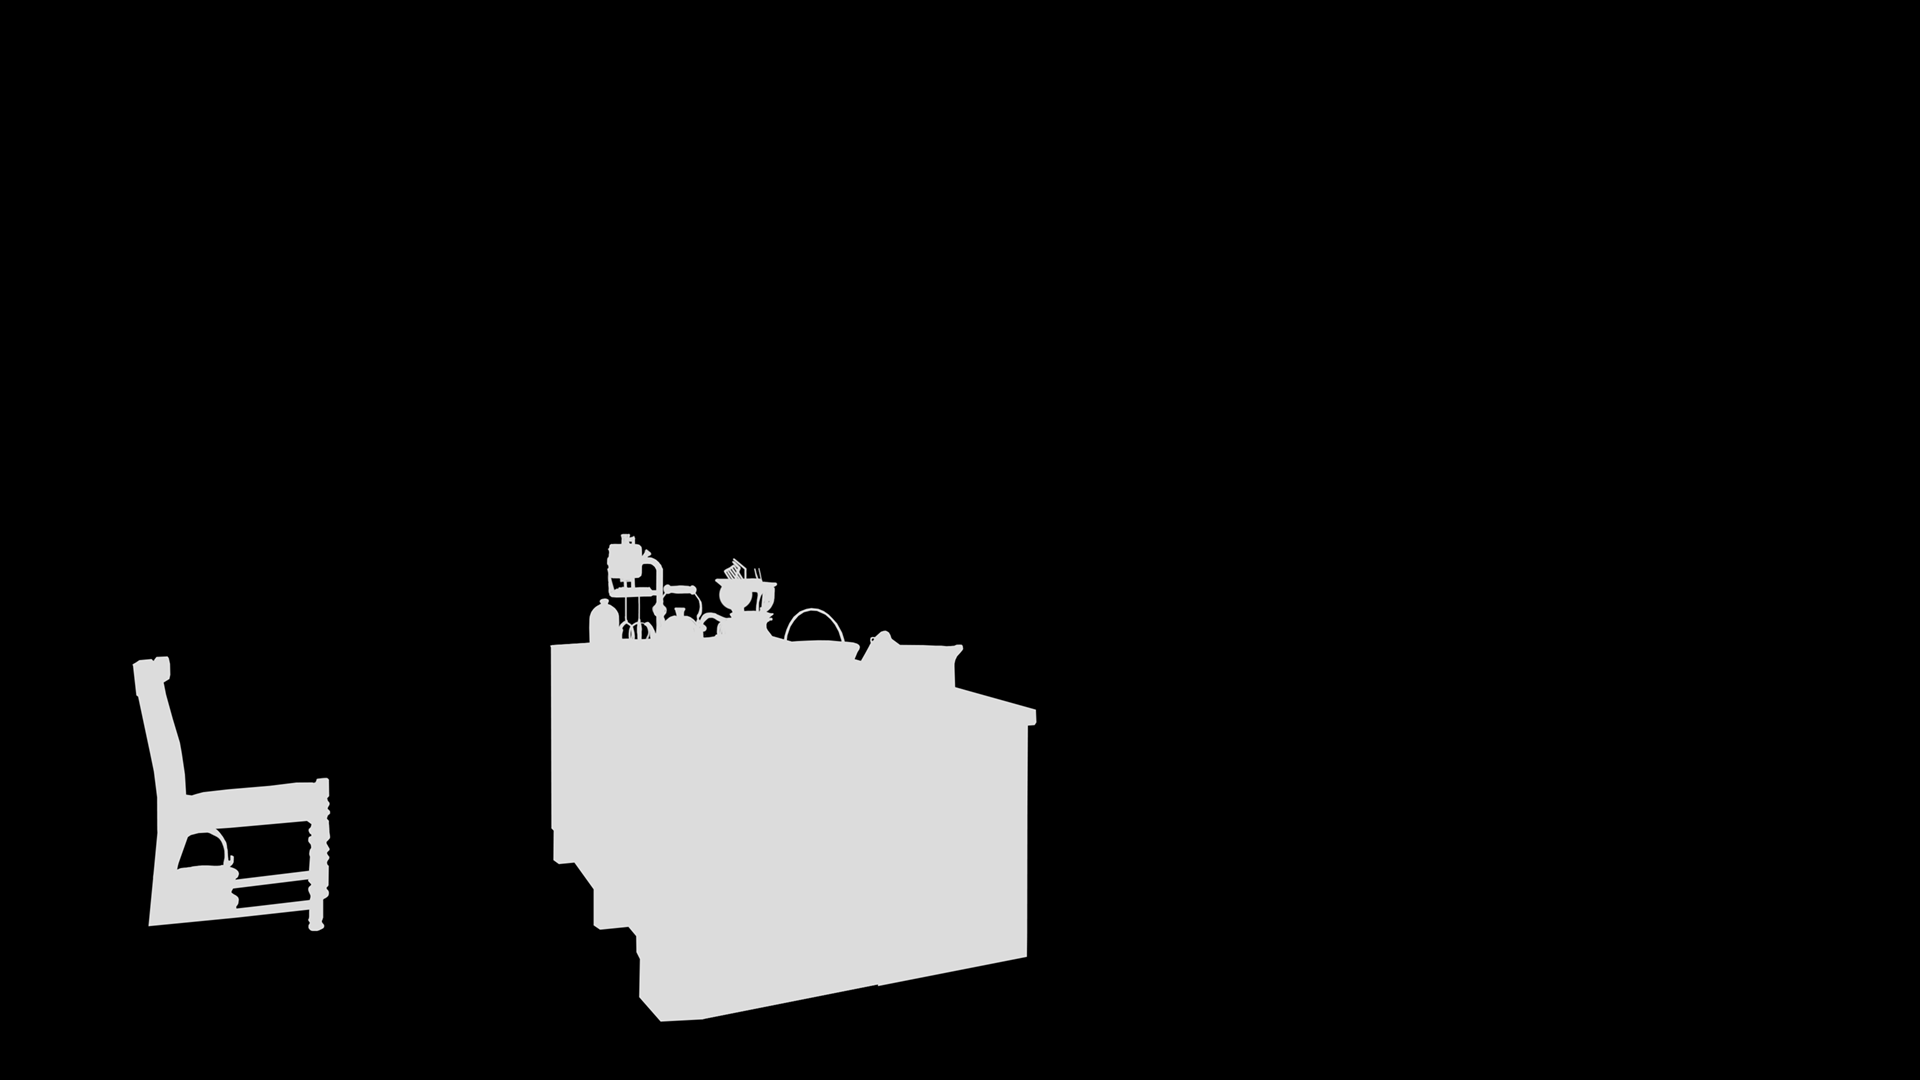
Sometimes Henning provides cutouts we can use for these masks. For others, it’s often just as easy to trace the objects in Photoshop and do a flood fill.
When rendering the scene in-game, there’s a simple shader that checks the character’s position in the scene against the depth mask and throws away pixels that are occluded. If something in the room never occludes a character, we generally don’t bother cutting it out, which is why this scene’s mask only contains two objects.
The Final Scene
Here’s what the final scene looks like at various times of day and with different lighting conditions:
Other Fun Stuff
Because much of the work Henning does is in 3D, sometimes we ask for those assets and retopologize them to be used in the game’s real-time 3D scenes. As mentioned, his process generally is not concerned with enormous polycounts, but those wouldn’t fly in our real-time segments, so they always involve some work.
Still, it’s been really useful. In some cases, Henning sent us a model, we used it in-game, then sent it back so he could reuse it in another background. It’s one example of how we can reuse assets to maintain visual consistency and keep the game running smoothly.
Hopefully this gives a bit of insight into how these scenes are put together and what goes into making them feel cohesive in-game.
Wishlist us Today
The Incident at Galley House is coming out in 2026. If you’re interested, please consider wishlisting the game on Steam!